Painting Kitchen Cabinets DIY (Everything You Need For A Fresh Kitchen Look!)
Revamping your kitchen with the addition of “new” cabinets doesn’t necessarily have to burn a hole in your pocket. If the idea of purchasing brand new cabinets and having them professionally installed seems like a financial stretch at the moment, there’s an easy and cost-effective alternative that can breathe new life into your space – painting the cabinets yourself. While the prospect might seem a bit intimidating at first, rest assured, it’s a task that’s quite manageable.
The first step in this DIY project is to decide on your color scheme. It’s crucial to opt for a semi-gloss or gloss paint, as these finishes are known to withstand the wear and tear of daily use better and are also easier to clean, thereby maintaining the fresh look of your cabinets for a longer period.
Next, you’ll need to remove all the doors, drawers, and hardware from your cabinets. This is followed by the application of two coats of primer. Once the primer has dried, lightly sand the surface to ensure a smooth finish. Keeping in line with the grain of the wood, apply the paint color of your choice to the front, back, and sides of the cabinet doors.
After the paint has dried, it’s time to reinstall the cabinets. At this point, you could consider adding new cabinet and drawer pulls for a fresh look, or alternatively, you could wash and reuse your old ones. A few simple coats of paint can truly transform a space, making it feel like new. Enjoy the process and the results!
Remember, our friends at Sherwin-williams are always more than happy to assist you with your paint selection and answer any questions you may have during this process!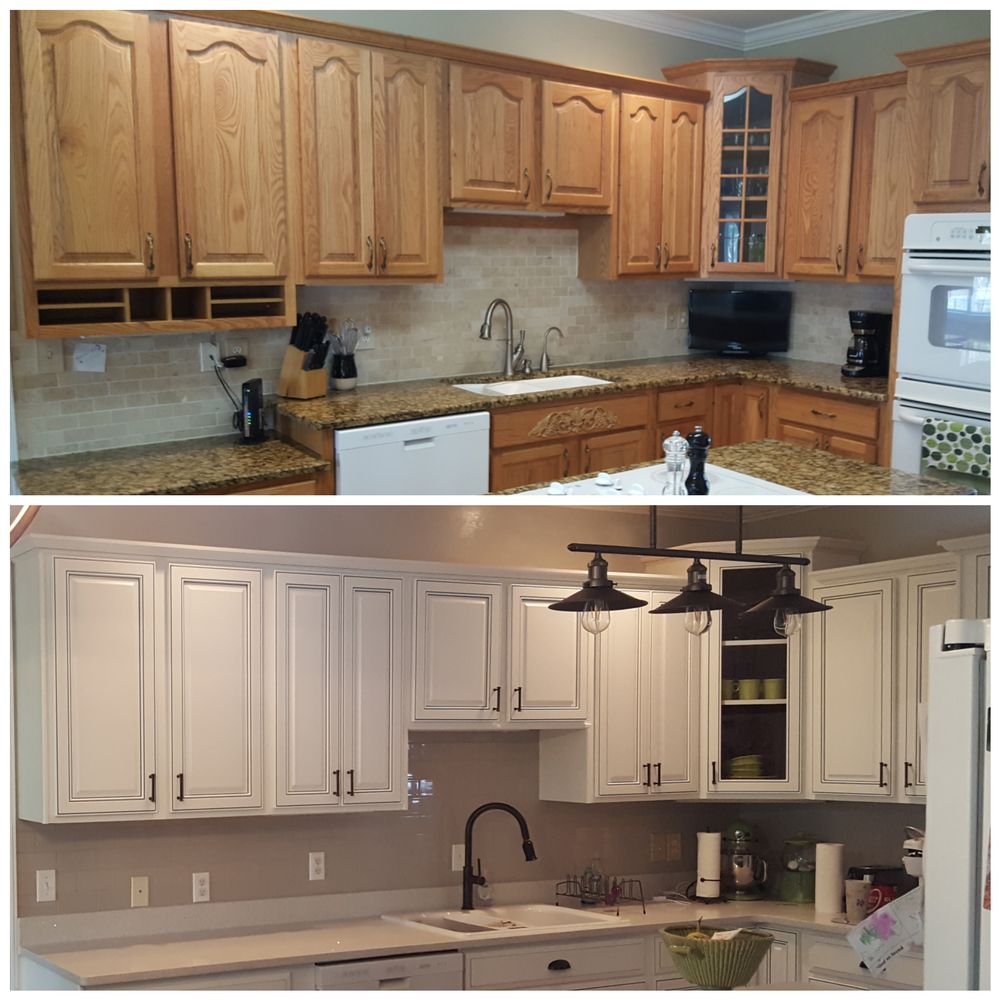
To recap, here is the breakdown of the steps:
- Choose your color scheme: Opt for a semi-gloss or gloss paint, which withstands daily use and is easier to clean.
- Remove all doors, drawers, and hardware: This will make the painting process easier and more efficient.
- Apply two coats of primer: This will help the paint adhere better and give a more polished look.
- Lightly sand the surface: Do this after the primer has dried to ensure a smooth finish.
- Apply the paint: Go with the grain of the wood and apply the paint to the front, back, and sides of the cabinet doors.
- Let the paint dry: This is crucial to ensure the paint sets properly.
- Reinstall the cabinets: Once the paint is dry, put everything back in place.
- Consider new cabinet and drawer pulls: You can add new ones for a fresh look, or wash and reuse your old ones.
Looking to find more ways to making your kitchen looking fresh? Call Unified Builders about your home and lets discuss how we can make a difference! ![]()
Source: Bob Vila
https://www.bobvila.com/articles/diy-home-projects/