DIY Window Film Installation: Improve Home Aesthetics and Privacy Effortlessly
Enhance Privacy and Aesthetics with Decorative Window Film: A Comprehensive Guide
If you’re dealing with a window that offers an unsightly view or lacks the desired level of privacy, applying decorative window film can be an effective and stylish solution. These films come in various opacities and patterns, mimicking materials like etched glass or rice paper, allowing you to customize your space without compromising natural light. While the installation requires precision, with practice, it becomes a manageable DIY project.
Benefits of Decorative Window Film
- Privacy Enhancement: Decorative films obscure visibility from the outside, ensuring privacy while maintaining light transmission.
- Aesthetic Appeal: With a wide range of designs available, these films can transform plain glass into a decorative feature, adding character to your interiors.
- UV Protection: Many window films block up to 99% of harmful UV rays, protecting your furnishings from fading.
Step-by-Step Installation Guide
Tools and Materials Needed:
- Decorative window film
- Measuring tape
- Utility knife or scissors
- Spray bottle filled with a solution of water and a few drops of baby shampoo
- Squeegee or a credit card wrapped in a soft cloth
- Lint-free cloth
Installation Steps:
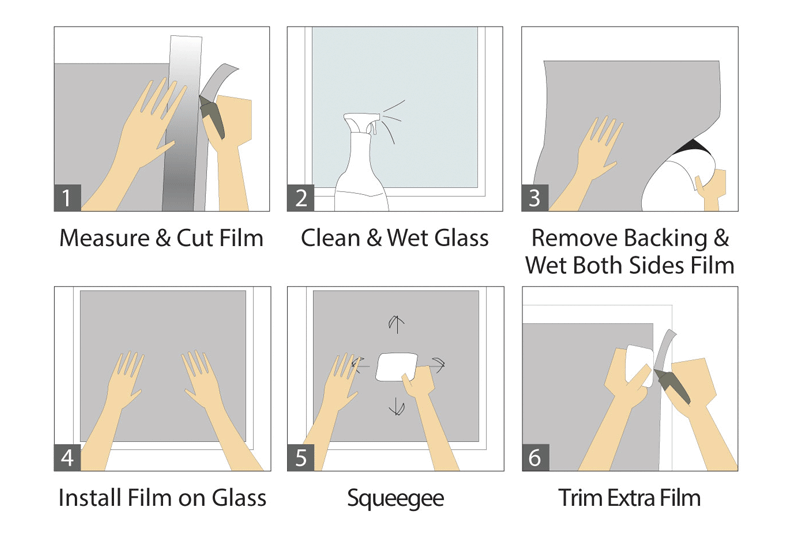
- Measure and Cut the Film:
- Measure the dimensions of the window pane.
- Cut the window film, adding an extra 2 centimeters to both the width and height to ensure full coverage.
- Clean the Window Surface:
- Thoroughly clean the window using the water and baby shampoo solution to remove dirt and debris.
- Dry the surface with a lint-free cloth to prevent any particles from being trapped under the film.
- Prepare the Film for Application:
- Peel off the backing from the window film. If the backing is difficult to remove, use two pieces of clear tape on one corner to separate it.
- Spray the adhesive side of the film generously with the soapy water solution to facilitate positioning.
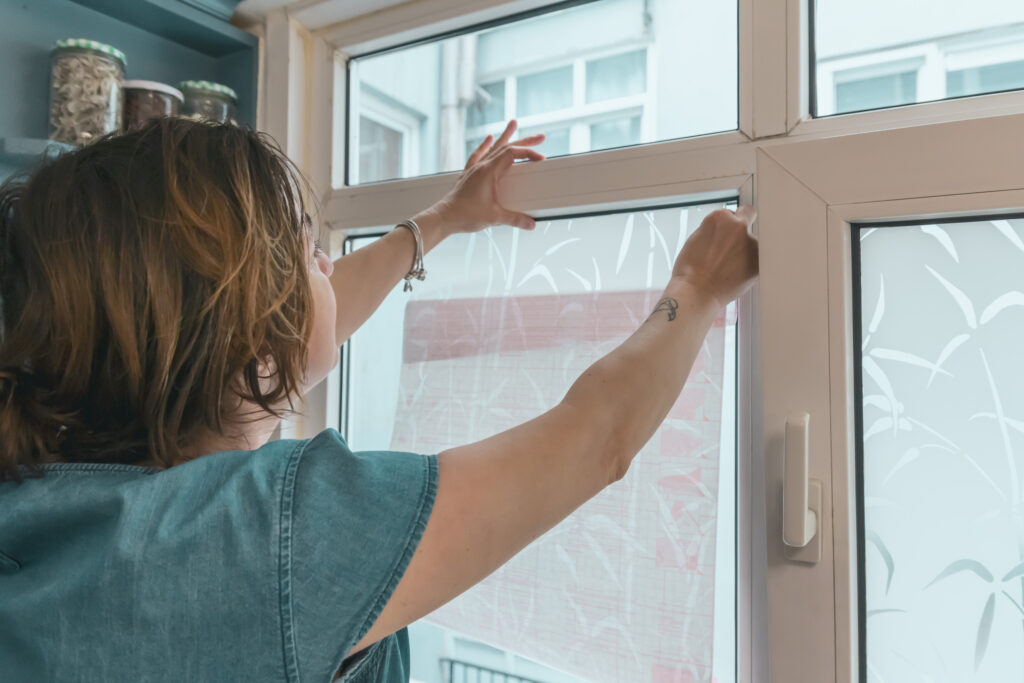
- Apply the Film to the Window:
- Spray the window surface lightly with the soapy water solution.
- Place the wet adhesive side of the film onto the wet glass, starting from the top and working your way down. The soapy water allows you to slide the film into the correct position.
- Remove Air Bubbles and Excess Water:
- Spray the surface of the film with the soapy water solution to lubricate it.
- Use a squeegee or a wrapped credit card to gently press out air bubbles and excess water, starting from the center and moving towards the edges.
- Trim Excess Film:
- Carefully trim any excess film from the edges using a sharp utility knife for a neat finish.
- Final Touches:
- Wipe the surface of the film with a lint-free cloth to remove any remaining moisture.
- Allow the film to dry and adhere properly, which may take a few days, depending on the product and environmental conditions.
Additional Tips
- Work in a Dust-Free Environment: Ensure the area is free from dust to prevent particles from getting trapped under the film.
- Use Ample Solution: Applying a generous amount of the soapy water solution to both the glass and the film helps in repositioning and reduces the likelihood of air bubbles.
- Seek Assistance for Larger Windows: For larger panes, having an extra pair of hands can make the application process more manageable.
By following these steps, you can effectively enhance the privacy and aesthetic appeal of your space using decorative window film. This cost-effective solution allows for customization without the need for permanent alterations to your windows.